
By Adna Aličić, iOS Developer
Introduction
Nowadays, we cannot imagine our lives without mobile phones. We are using it for communication, for keeping up with our obligations and more and more for paying our bills and finance management. Today almost every mobile phone has applications for managing money in the form of credit, debit, or coupon cards.
But, the question is how do we connect applications that we are developing with one of the existing applications for storing and using payment cards. One of those apps is Apple Pay and Apple Wallet. In this blog, we will explain basic steps that you need to take for integrating Apple Wallet and list a few obstacles that you can encounter if this is your first time connecting the app with it.
What is Apple Wallet and Apple Pay, and what do we need it for?
Apple Wallet is native iOS application that allows storing coupons, tickets, passes, credit cards, debit cards, and more. Users can use it to get into movies, to redeem rewards or coupons, or just to check expiration dates, row seats, etc.
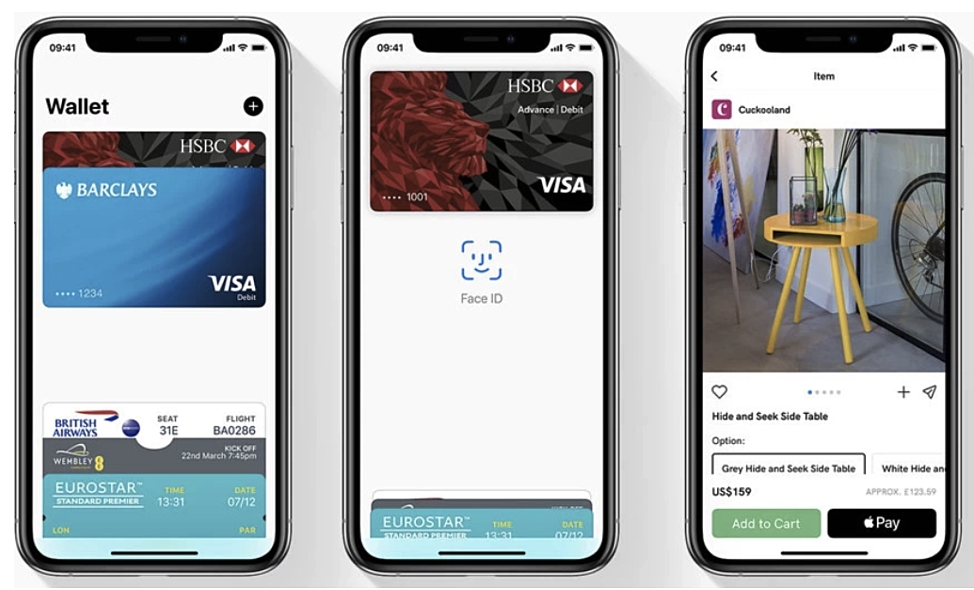
If there is a need for usage of payment cards, users should set up Apple Pay. It allows users to make secure payments in stores, in apps or websites that support Apple Pay.
Apple allows developers to integrate Apple Wallet and Apple pay with their application, by following steps that are listed and explained below.
There is also one thing that will be mentioned, that you may not be familiar with and it is Apple Pay In-App Provisioning. Apple Pay In-App Provisioning provides a card issuer the ability to initiate the card provisioning process for Apple Pay directly from the issuer’s app. It also simplifies the usage of Apple Wallet and Apple Pay for cardholders, because it eliminates the need to input card details manually.
Steps for integrating app with Apple Wallet and Apple Pay
One of the first obstacles that we encountered is a lack of documentation. Because of that, we had a problem finding a starting point but also we could not get a big picture of all things that we needed to have before implementation. So, here you can find steps that will lead to connecting the app with Apple Wallet.
0. Preparing the app
Your app should be posted on iTunes Connect because it provides an Adam ID that needs to be sent by email in the next step. Using TestFlight builds is the only correct way to test the app with this feature. This step is marked with 0 because it does not necessarily lead to connecting the app with Apple Wallet, but it is needed in later steps.
1. Getting Entitlements
This is the first step you need to take in order to integrate Apple Wallet in your app. To request the Entitlements and whitelist your app, you should send the information listed below by email to [email protected]. Information that should be sent:
Type of Entitlement being requested:
– In-App Provisioning,
– Wallet Suppression,
– NFC.
● Team ID,
● App / Adam ID,
● Bundle ID (if applicable),
● Team or Company name,
● The country in which your business operations are conducted.
It usually takes 2-3 business days for requested Entitlements to be granted, but you will be notified when it happens.
2. Using Entitlements
● The next thing that needs to be done is to use the Entitlements. To perform this you should follow
the steps below:
● Head to the Apple developer website, login, edit your distribution provisioning profile, select the
entitlement from the drop down menu.
● In Xcode build settings, select the profile from step 1 to sign the app for distribution.
● In Xcode, manually add the entitlement to the entitlement plist.
3. Getting documentation
In order to understand flow and implementation, you should request documentation. In-App Provisioning documentation is not publicly available and it can be requested in the same email thread after getting entitlements. The first document you might need is called “Getting Started with Apple Pay In-App Provisioning” and it explains flow, best practices, and other details that are needed for implementation.
4. Implementation
The main thing to use in the app is the PassKit framework. PassKit is used for requesting and processing Apple Pay payments in the app. Also, it is used to create, distribute, and update passes for the Wallet app.
There is also part of the implementation that should be implemented on the backend. This is explained in the provided documentation. Documentation should be the main thing you refer to and follow in implementation.
Recommendations
Apple has recommendations that should be followed before and during implementation. One of the first recommendations is to authenticate the user via One Time Password (OTP) when the user first installs the app on the device. This way the app satisfies Apple Pay MFA requirements and you avoid the need to introduce additional authentication steps within the In-App Provisioning flow.
In your app, you should also use the Add to Apple Wallet button, which is proposed by Apple. This is a way of indicating that the Apple Wallet is integrated with the app. You should not create your own buttons because it can lead to rejection of the app during Apple review.

There are also other recommendations listed in the provided documentation and they represent something that should be followed for better user experience or greater security of the app.
Conclusion
Applications like Apple Wallet and Apple Pay are becoming more and more important. Their usage is increasing every day. Integrating your app with one of these apps ensures that you are following the latest trends and keeping up with technology development. It is just a matter of time when we will stop using cash and physical cards and instead we will start using our mobile phones and apps for everyday usage.